150mm Wall Penetration Unit Installation Instructions (Untested Heater)
../Installation Guides/150mm Wall Penetration Unit Installation Guide (Untested Heater)
THIS KIT HAS BEEN MANUFACTURED IN ACCORDANCE WITH AS/NZS 2918:2001. TO ENSURE SAFETY THIS KIT MUST BE INSTALLED AS OUTLINED IN THESE INSTRUCTIONS. HEATER AND FLUE CLEARANCES FROM COMBUSTIBLE WALLS MUST BE IN ACCORDANCE WITH HEATER MANUFACTURERS SPECIFICATIONS AND AS/NZS 2918:2001.
N.B IT IS THE RESPONSIBILITY OF THE INSTALLER TO ENSURE THAT THE INSTALLATION OF THIS FLUE KIT COMPLIES WITH AS/NZS 2918:2001, THE APPLIANCE MANUFACTURERS SPECIFICATIONS FOR FLUES, AND THAT THE RELEVANT LOCAL BODY REQUIREMENTS ARE ADHERED TO.
-
Cut a 305 square hole through wall structure. Nog if necessary for structural support.
-
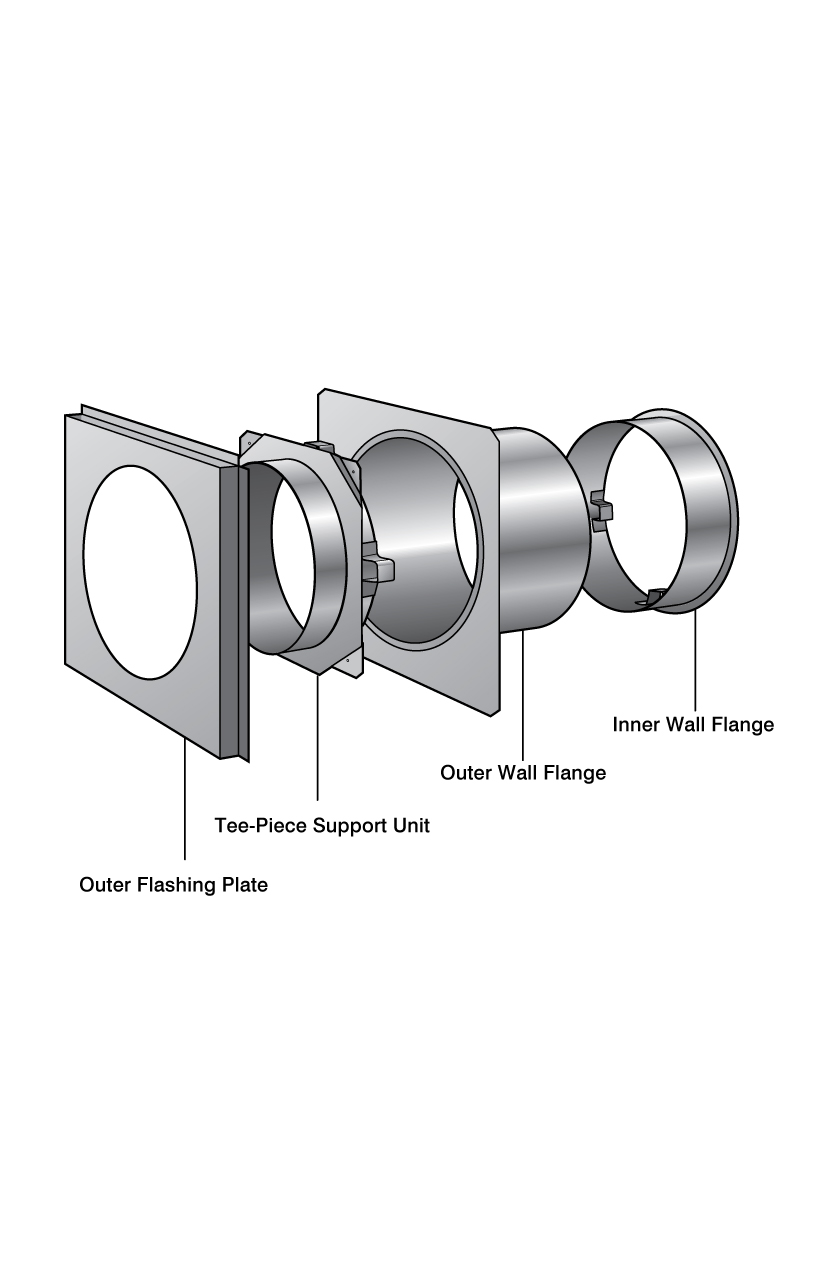
Measure overall depth of wall. On site trim outer wall flange as required. Ensure OUTER WALL FLANGE is flush with the surface of the inner wall or no more than 50mm shorter.
-
Fix OUTER WALL FLANGE through wall structure, securing the square outer flange to outer surface of external wall.
-
Insert INNER WALL FLANGE through the inner wall into the OUTER WALL FLANGE and secure with rivets or screws.
-
Insert TEE-PIECE SUPPORT UNIT into OUTER WALL FLANGE and secure with screws or rivets.
-
Measure the overall length of the installed WALL PENETRATION UNIT making allowance for the distance the OUTER CASING will stand off the outside wall surface. Calculate the required lengths of FLUE PIPE STUB, INNER CASING STUB and OUTER CASING STUB.
According to AS/NZS 2918:2001 both double flue pipe casing’s must extend a distance of not less than 150mm on both sides from the surface of a heat sensitive wall through which the flue pipe passes.
-
Secure the square OUTER FLASHING PLATE to the OUTER WALL FLANGE.
-
With the FLUE PIPE STUB, INNER CASING STUB and OUTER CASING STUB riveted to the TEE-PIECE, fit and secure the TEE-PIECE to the SUPPORT UNIT and secure with rivets or screws.
-
Fix the WALL TRIM PLATE (not supplied) to the surface of the inner wall. Use 12mm ceramic spacers to space the plate off the wall surface.
-
Silicone all joints to weather proof.
-
Check installation is in accordance with summary.