150mm Chimney Flue Kit Installation Instructions
../Installation Guides/150mm Chimney Flue Kit Installation Instructions
THIS FLUE KIT HAS BEEN MANUFACTURED IN ACCORDANCE WITH AS/NZS 2918:2001
WARNING: TO ENSURE SAFETY THIS FLUE KIT MUST BE INSTALLED AS OUTLINED IN THESE INSTRUCTIONS. THE APPLIANCE TO WHICH IT IS CONNECTED MUST BE INSTALLED IN ACCORDANCE WITH ITS MANUFACTURERS SPECIFICATIONS AND AS/NZS 2918:2001
-
Ensure the chimney is clean and free of soot. Check the chimney for structural soundness.
-
Install Wood Fire into fireplace according to manufacturer’s specifications.
-
By looking down chimney, check that the heaters flue outlet is in line with chimney. If not, an OFFSET or BENDS will be required.
-
Assemble FLUE PIPES together ensuring seams are in line. Joints must be compressed fully and secured with 3 rivets.
-
Lower assembled FLUE PIPE, crimped end down, into Wood Fire flue spigot. On some installations it may be desirable to assemble FLUE PIPE lengths as they are lowered into the chimney.
-
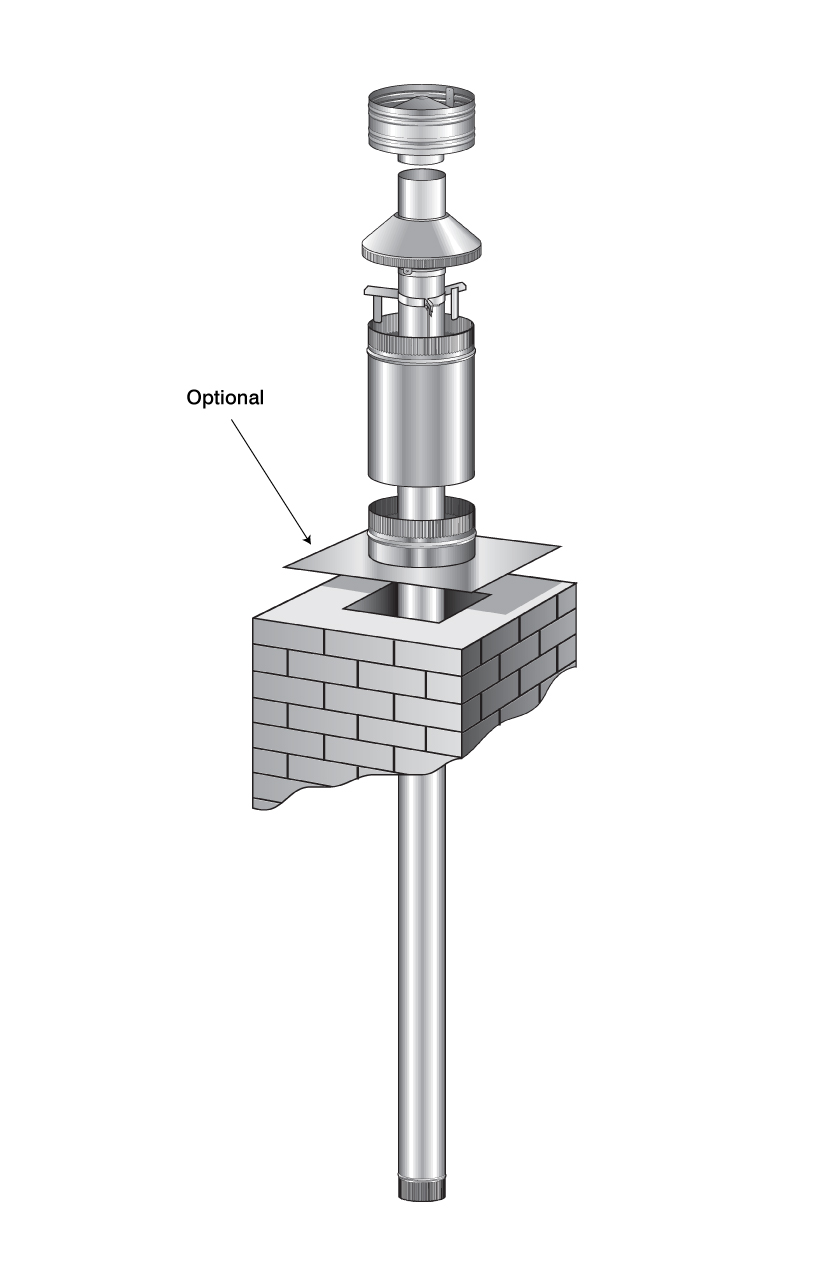
Secure CHIMNEY FLASHING PLATE and/or OUTER CASING to chimney with suitable fasteners and weather seal to the chimney top with mortar and/or silicone.
-
Check the FLUE PIPE extends above the top of the CHIMNEY FLASHING PLATE or OUTER CASING 145mm. Add sufficient stainless steel FLUE PIPE or trim OUTER CASING to attain this measurement.
-
Fix TOP FLUE SPACER BRACKET to the FLUE PIPE making sure the lugs fit snugly inside the OUTER CASING.
-
Fit CASING COVER over FLUE PIPE and push down firmly onto TOP SPACER BRACKET.
-
Fit COWL but do not secure, as removal for flue cleaning will be necessary. Deform or ovalise the stub of the COWL to ensure it is a tight friction fit.